
OpenClaw Setup Guide
Set up your instance, approve your browser and send your first message.
Get Your Instance
After subscribing, open “My OpenClaw” and click the red “Create and initialize” button highlighted by arrow 1. OpenClaw creates your instance, sets up its address and any models included in your plan, then checks that it is ready. You can close or refresh the page while it works; return here to check progress rather than submitting again.
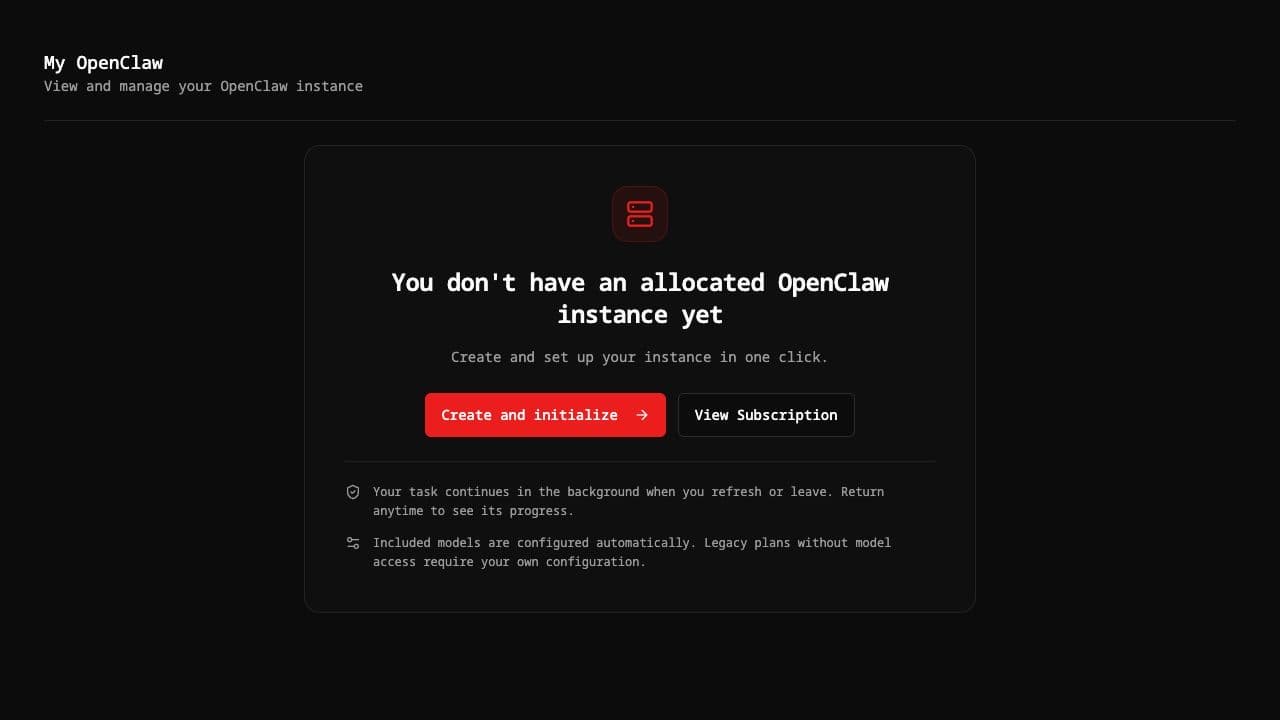
Open Web UI
When setup finishes, select “Overview” and click “Open Control UI” at the bottom of the page, as shown by arrow 2. This opens your instance’s control panel in a separate tab. Keep “My OpenClaw” open too: you may need it to copy the access token or approve your browser.
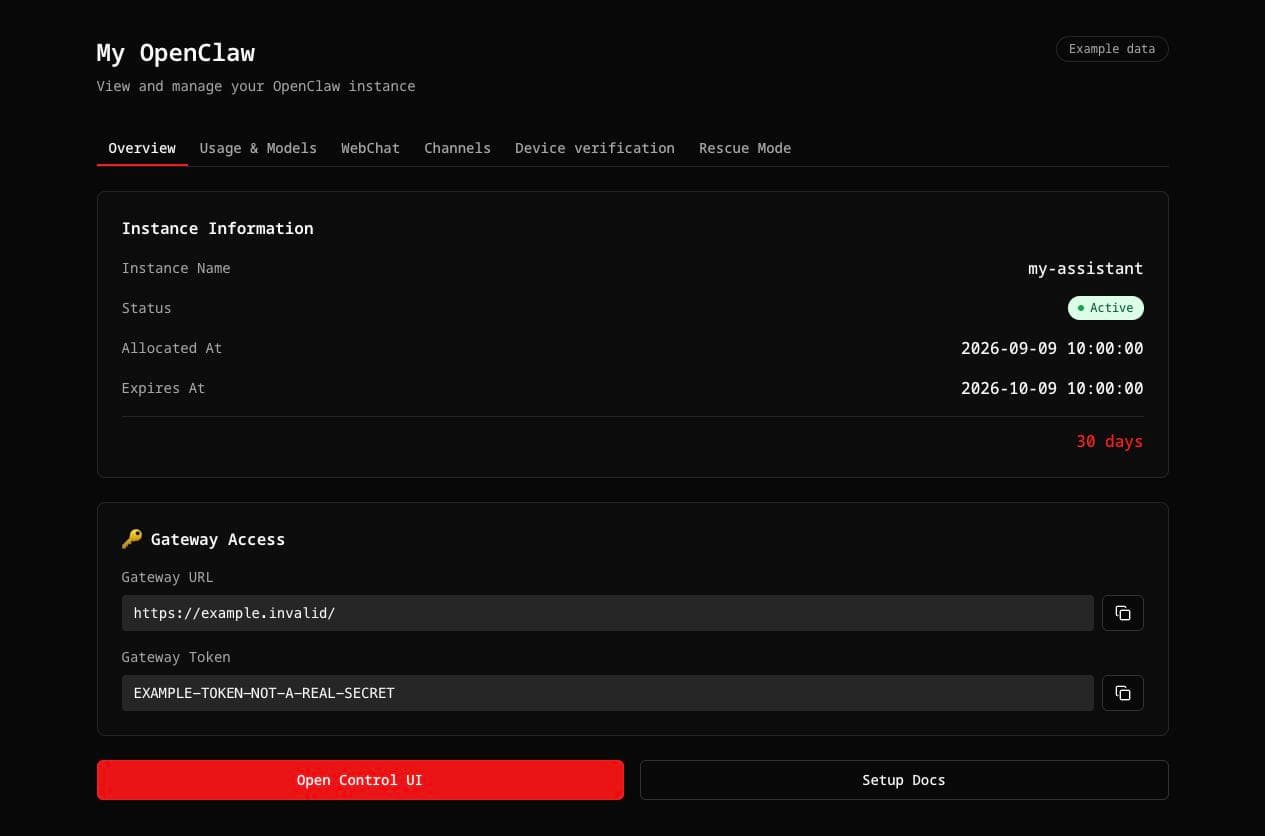
Connect with Gateway Token
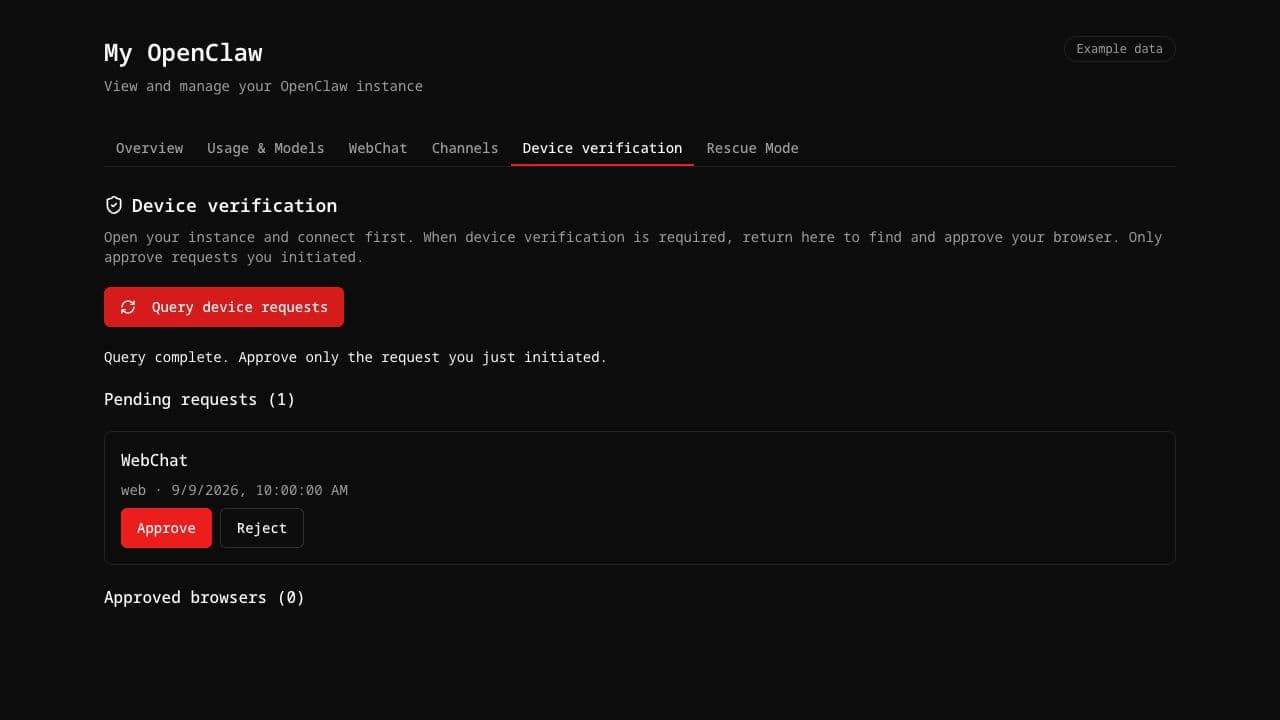
In “Overview”, copy the Gateway Token using the copy icon beside it. Enter it in Control UI when prompted and connect. If the browser needs approval, return to “My OpenClaw”, open “Device verification” and click “Query device requests” (arrow 3). The Gateway Token grants access to your instance; it is not a model API key. Keep it private.
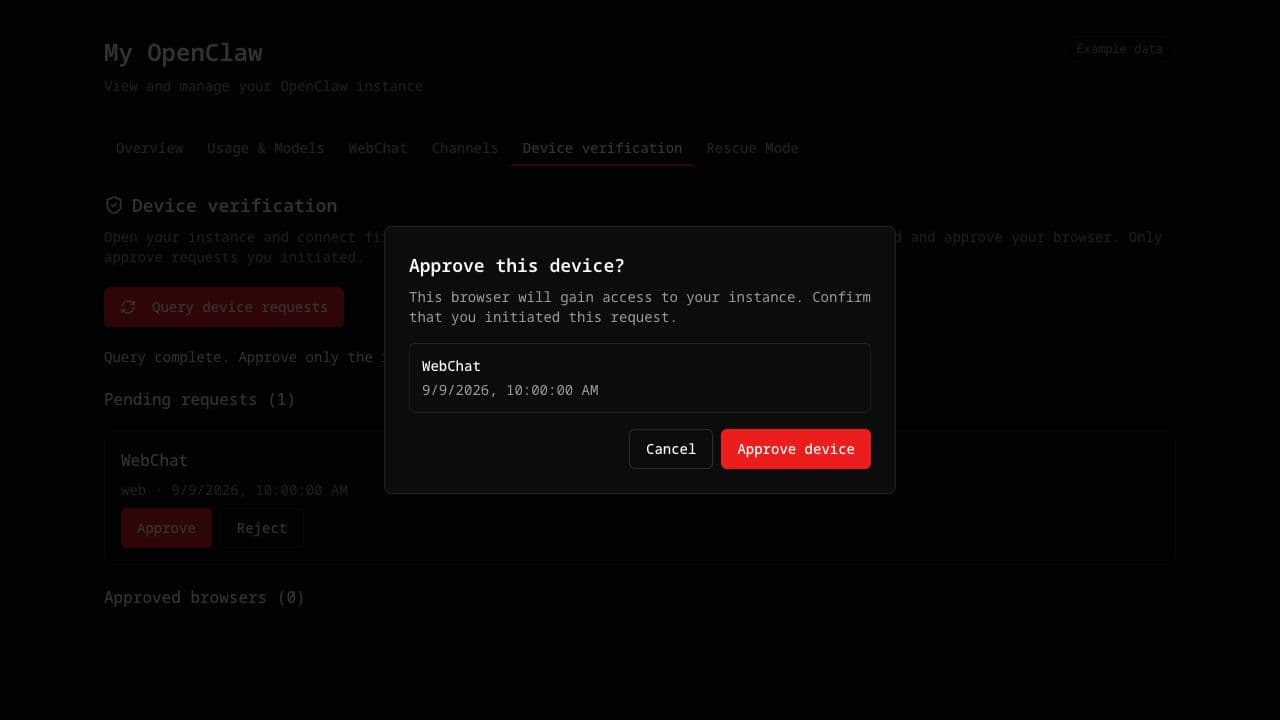
Check the device name and request time, then click “Approve” for your own request. In the confirmation dialog, click “Approve device” (arrow 4). Return to Control UI and reconnect. Reject requests you do not recognize, and revoke access for devices you no longer use. If a request expires, connect again to send a new one.
AI models are configured automatically
Open “Usage & Models” to check the models configured for your instance. Plans that include model access are set up automatically during initialization. If you have a legacy plan without model access, add your own provider credentials here. Do not use the Gateway Token as a model API key; they serve different purposes.
If the page says model configuration is missing, click “Configure Now” and wait for it to finish before trying again. An API add-on bought earlier may need to be connected to the new instance separately. If your models are already listed and working, there is nothing else to configure.
Start Using
Open “WebChat”. If you see a device-verification prompt, click “Go to device verification” (arrow 7), then “Query device requests”. Approve the request named “WebChat” and confirm. WebChat and Control UI connect separately, so authorizing one does not automatically authorize the other. You can do this on the website without terminal commands.
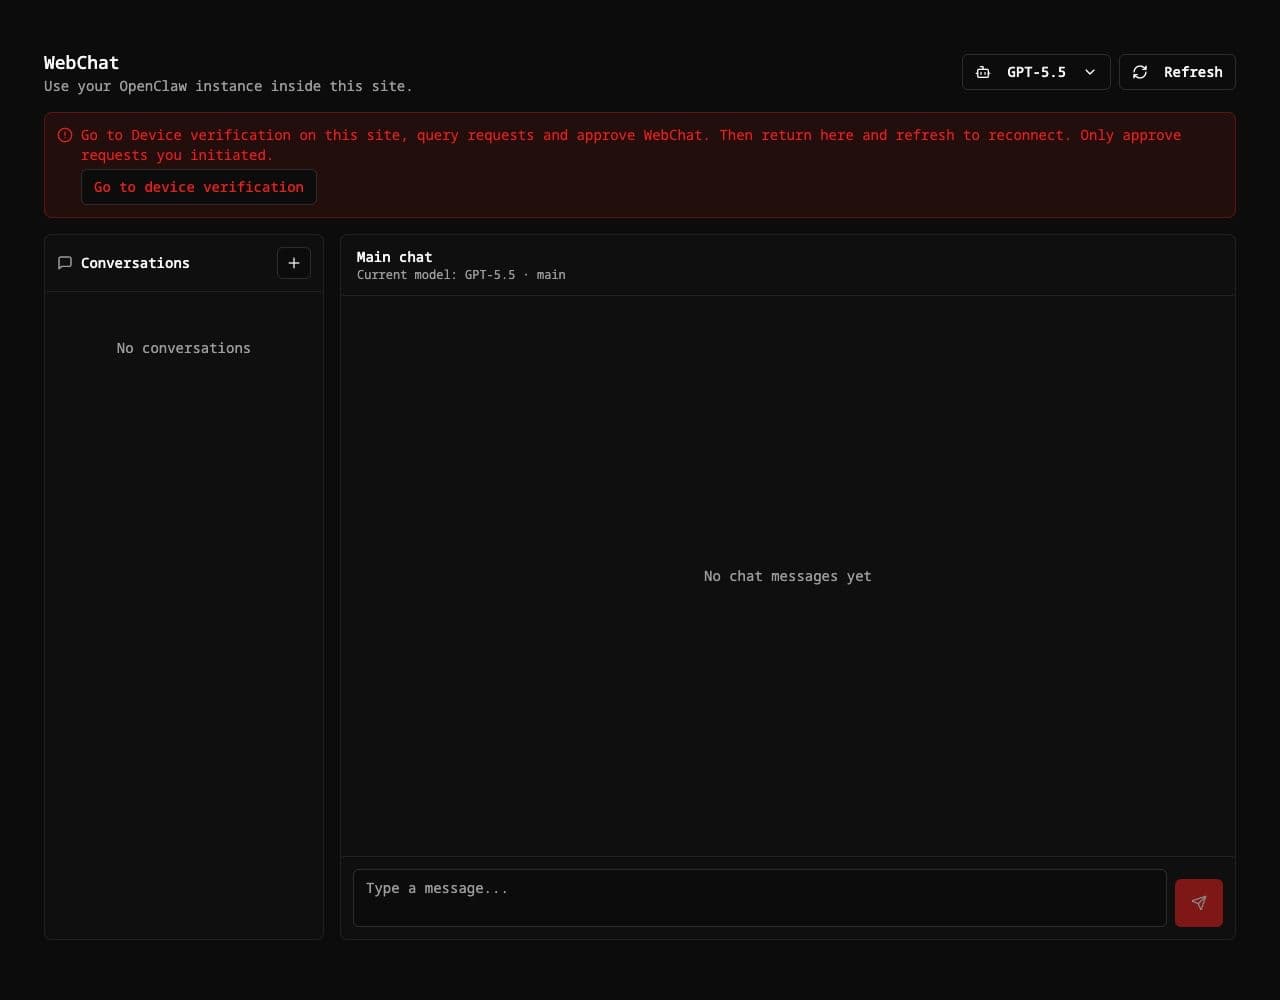
Go back to “WebChat” and refresh the chat using its refresh button. Open an existing conversation or click “+” to create one, choose an available model, and send a message. Normal reconnects reuse the approved identity. You only need to verify again if the site asks you to, for example after access has been revoked.
Need Help?
If setup fails, use “Continue initialization” when it becomes available; there is no need to create another instance. If no device request appears, first try connecting from the browser you want to use, then query again. Still unable to chat after approval? Refresh once and contact support with the error shown on screen. Never send your tokens or API keys.